
I air layered two Chinese elms this spring. They both rooted beautifully but one got hit by a heat wave and lost all its leaves—surprisingly it might still survive!
I documented the whole process, step-by-step, with photos of both outcomes and the takeaways I’m applying to future bonsai projects.
Here’s what happened—and what I learned.
Step-by-Step: How to Air Layer a Bonsai Tree (Chinese Elm)
If you’re new to air layering bonsai, it’s a great way to propagate a new tree from an existing tree. The idea is simple—encourage a branch to root while still attached to the main tree and then separate it once it does. In practice, it takes patience and doesn’t always work. Here’s a quick look at how I did it:
1. Select your branch – Ideally one you want to separate and shape into a new bonsai.
2. Girdle the bark – Remove a ring of bark about 1-2” wide and scrape away the cambium layer.
3. Apply rooting hormone – Apply hormone to the bark above the ring that was removed; this is where the roots will emerge.
4. Wrap with soil medium – I used coco coir this time, though sphagnum moss is more common. It should be moist, not soaking wet.
5. Seal it up – I used plastic wrap and zip ties to keep the coir moist and foil to keep it dark.
6. Wait and monitor – I started seeing root formation around 6 – 8 weeks.

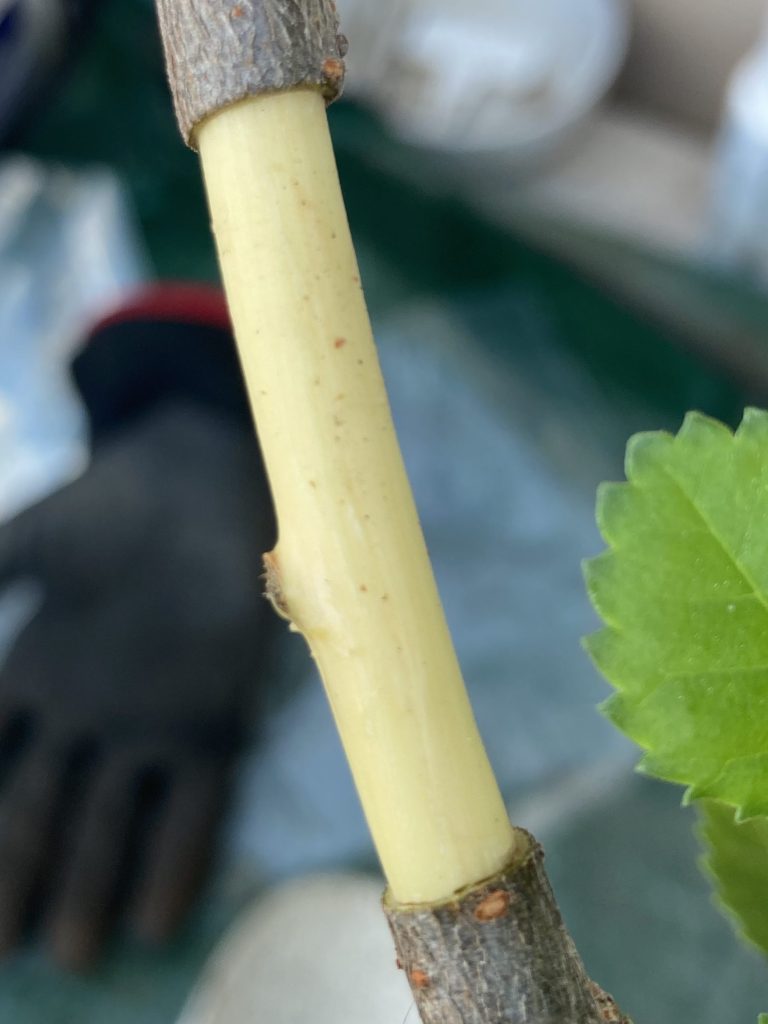
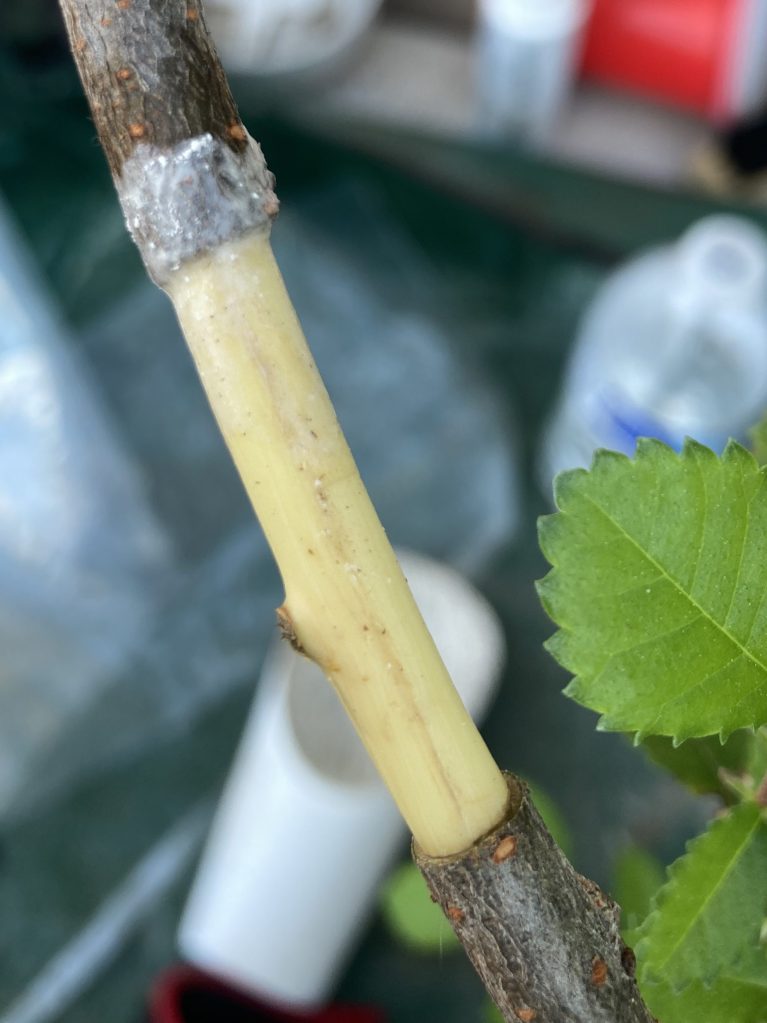
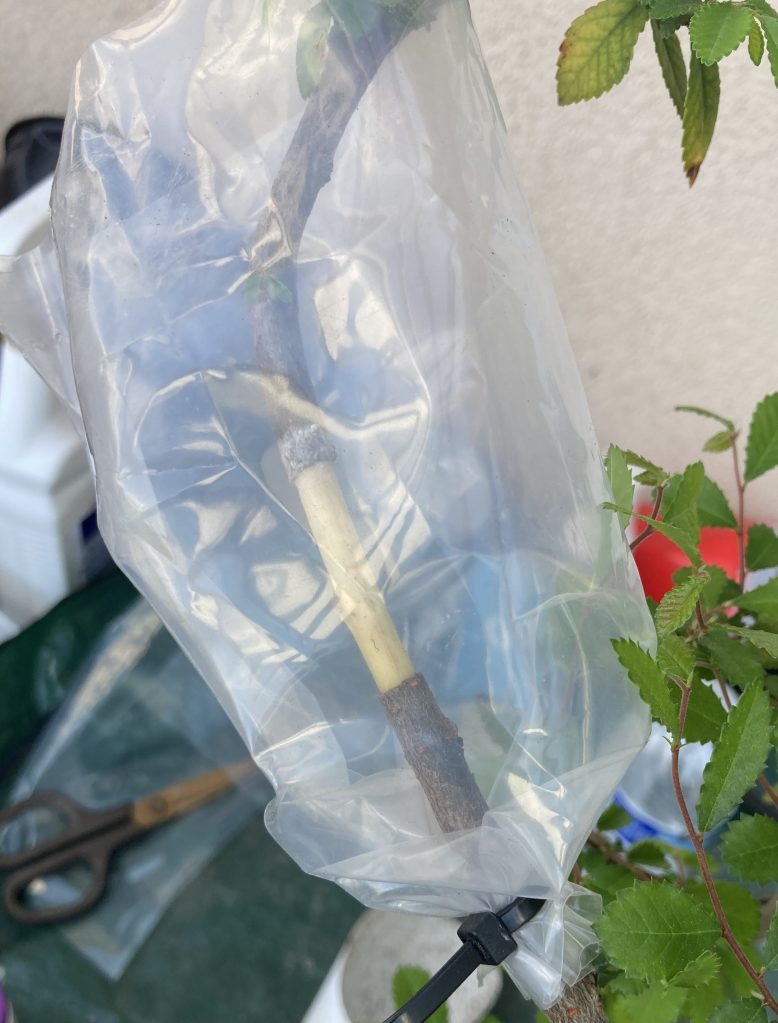
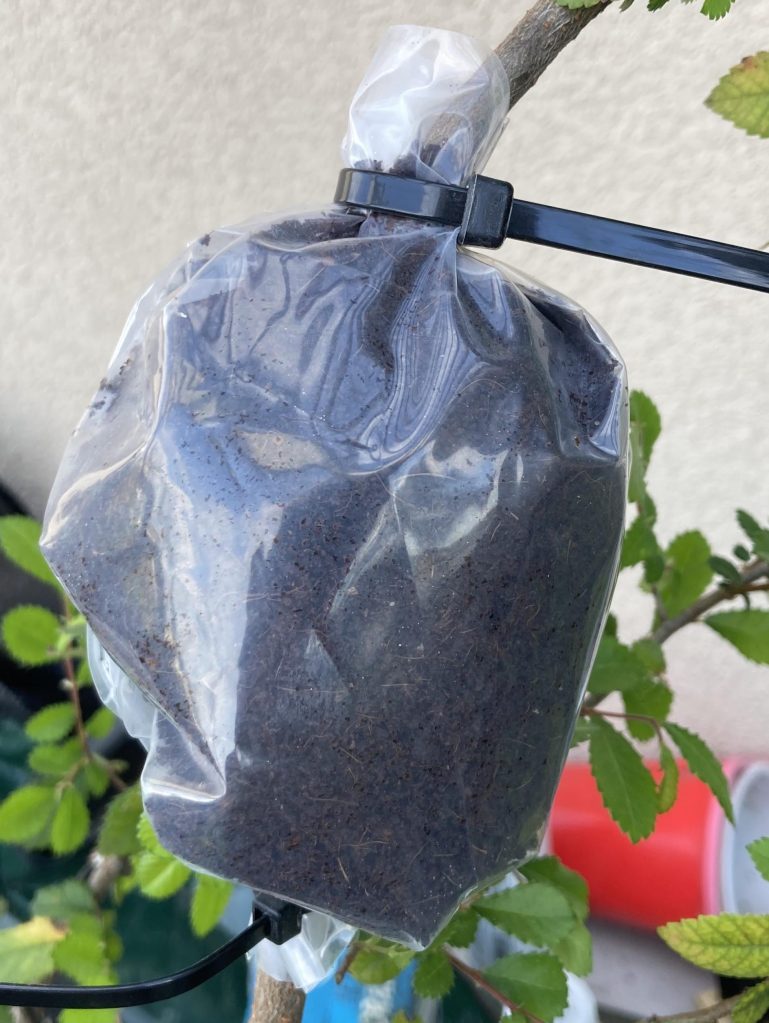

The Heat Wave Surprise
One of the air layers was positioned in full sun, and during an unexpected spring heat wave, the moisture in the coir evaporated. I noticed the leaves above the air layer were completely dried out and when I checked the bag, the soil was bone dry.
Still, when I removed the plastic, the roots looked surprisingly healthy.
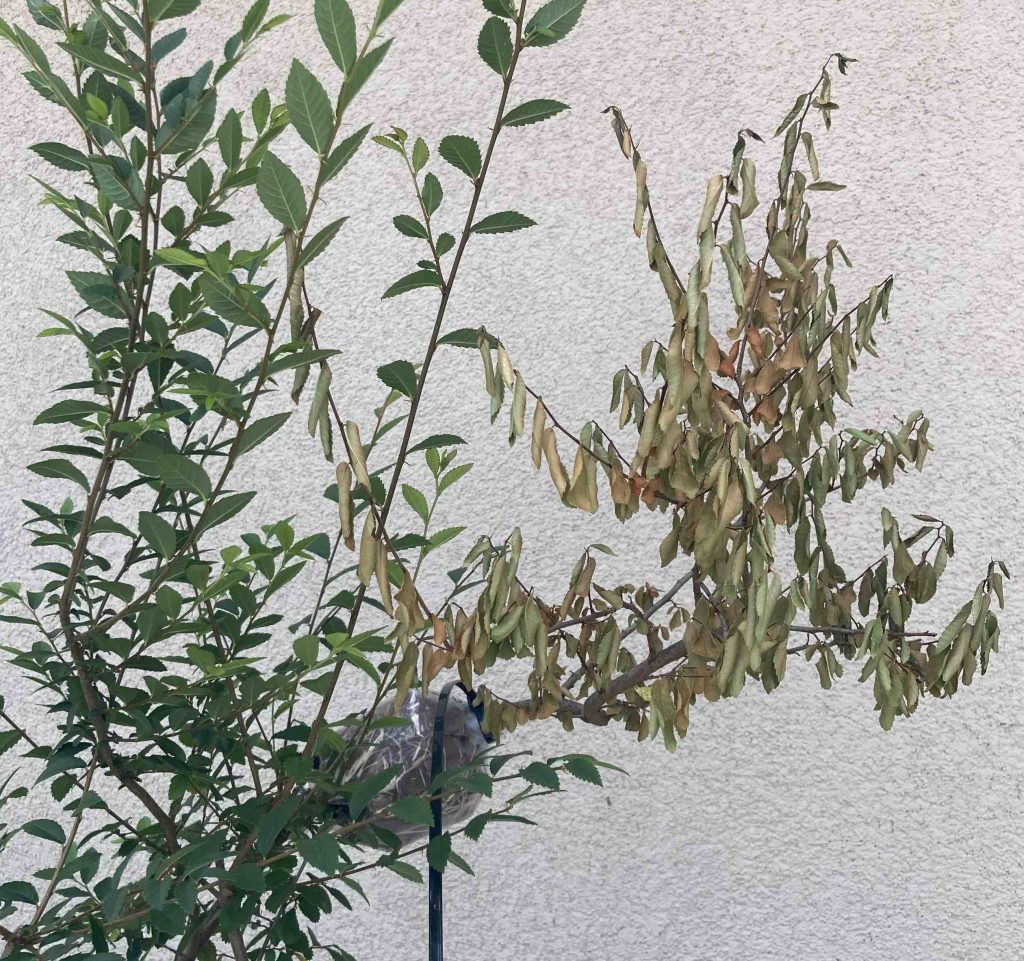


I trimmed off the dead foliage and scratched the bark—still green underneath, which means the tree was alive. I soaked the roots immediately, potted it, and placed it in shade to recover.
The One That Went Smoothly (Almost)
The second air layer had vigorous root growth—but most of it developed on one side of the trunk. That’s not ideal for long-term nebari, but it’s still viable. I trimmed the foliage to reduce the water load on the roots and potted the tree for recovery.
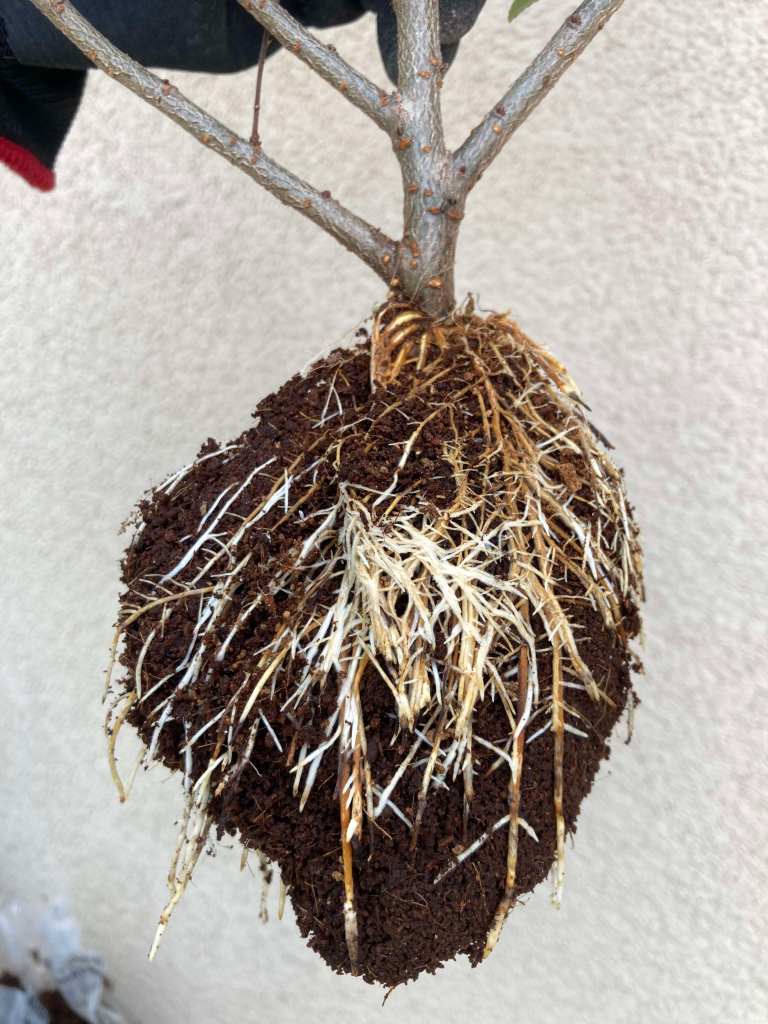
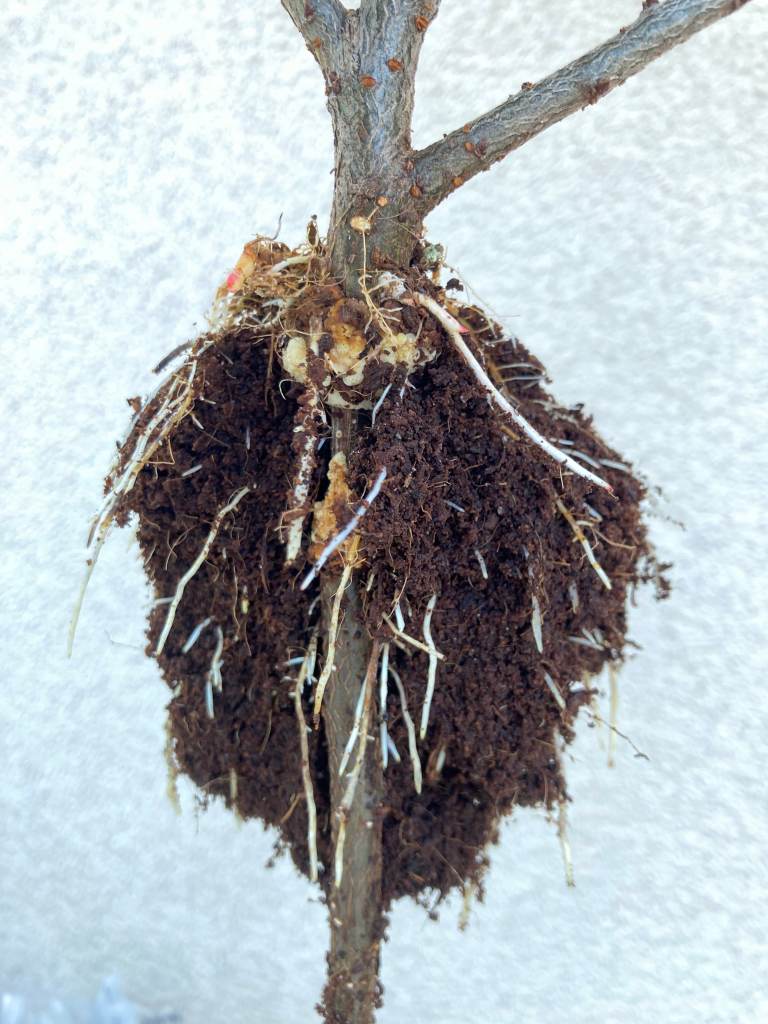
This tree should establish quickly, and I’ll let it grow freely this year before starting bonsai training.
Key Takeaways: What I Learned About Air Layering Bonsai
Whether you’re air layering Chinese elm or another species, here are some useful tips from this spring’s experiment:
- Keep air layers in partial sun—full sun can dry them out quickly, especially as temperatures rise.
- Check moisture more frequently in spring heat. I’ll check every few days instead of every few weeks going forward.
- Trim foliage after separation to reduce water stress on the roots.
- One-sided root growth is manageable, but stake or support the tree while it stabilizes—mine are tied down with wire.
- Don’t give up on crispy leaves. If the cambium is green and roots are there, your air layer might still pull through.
Final Thoughts
Even though one of my trees suffered from heat stress, both air layers were valuable learning experiences. The one with crispy leaves might still make it, and the other will likely thrive with time.
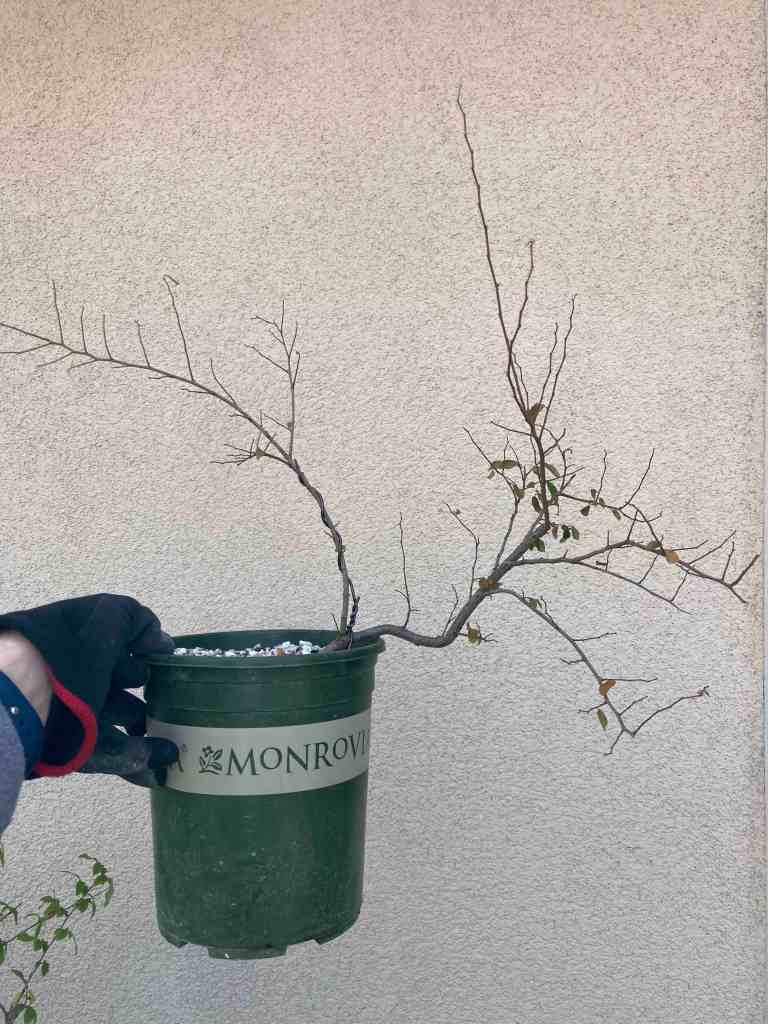

I’ll share how both trees progress over the next few weeks on Instagram—especially the one recovering from heat stress. And since I’m heading to Japan next month, I’m excited to bring back fresh inspiration and photos for upcoming posts.
If you’re curious how these trees turn out—or want to follow along during the Japan trip—come join me on Instagram @morgansbonsai.
Like this post?
I share reflections, tips, and tools I’ve found helpful along my bonsai journey. Subscribe to follow along and grow with me!